Intro to workspaces
Everything you do in Notion takes place in a workspace. It's your virtual home to organize information and create exactly the way you want — as just one person, together as a team, or across a whole company. Expand, edit, and mold it to fit your needs 🏠
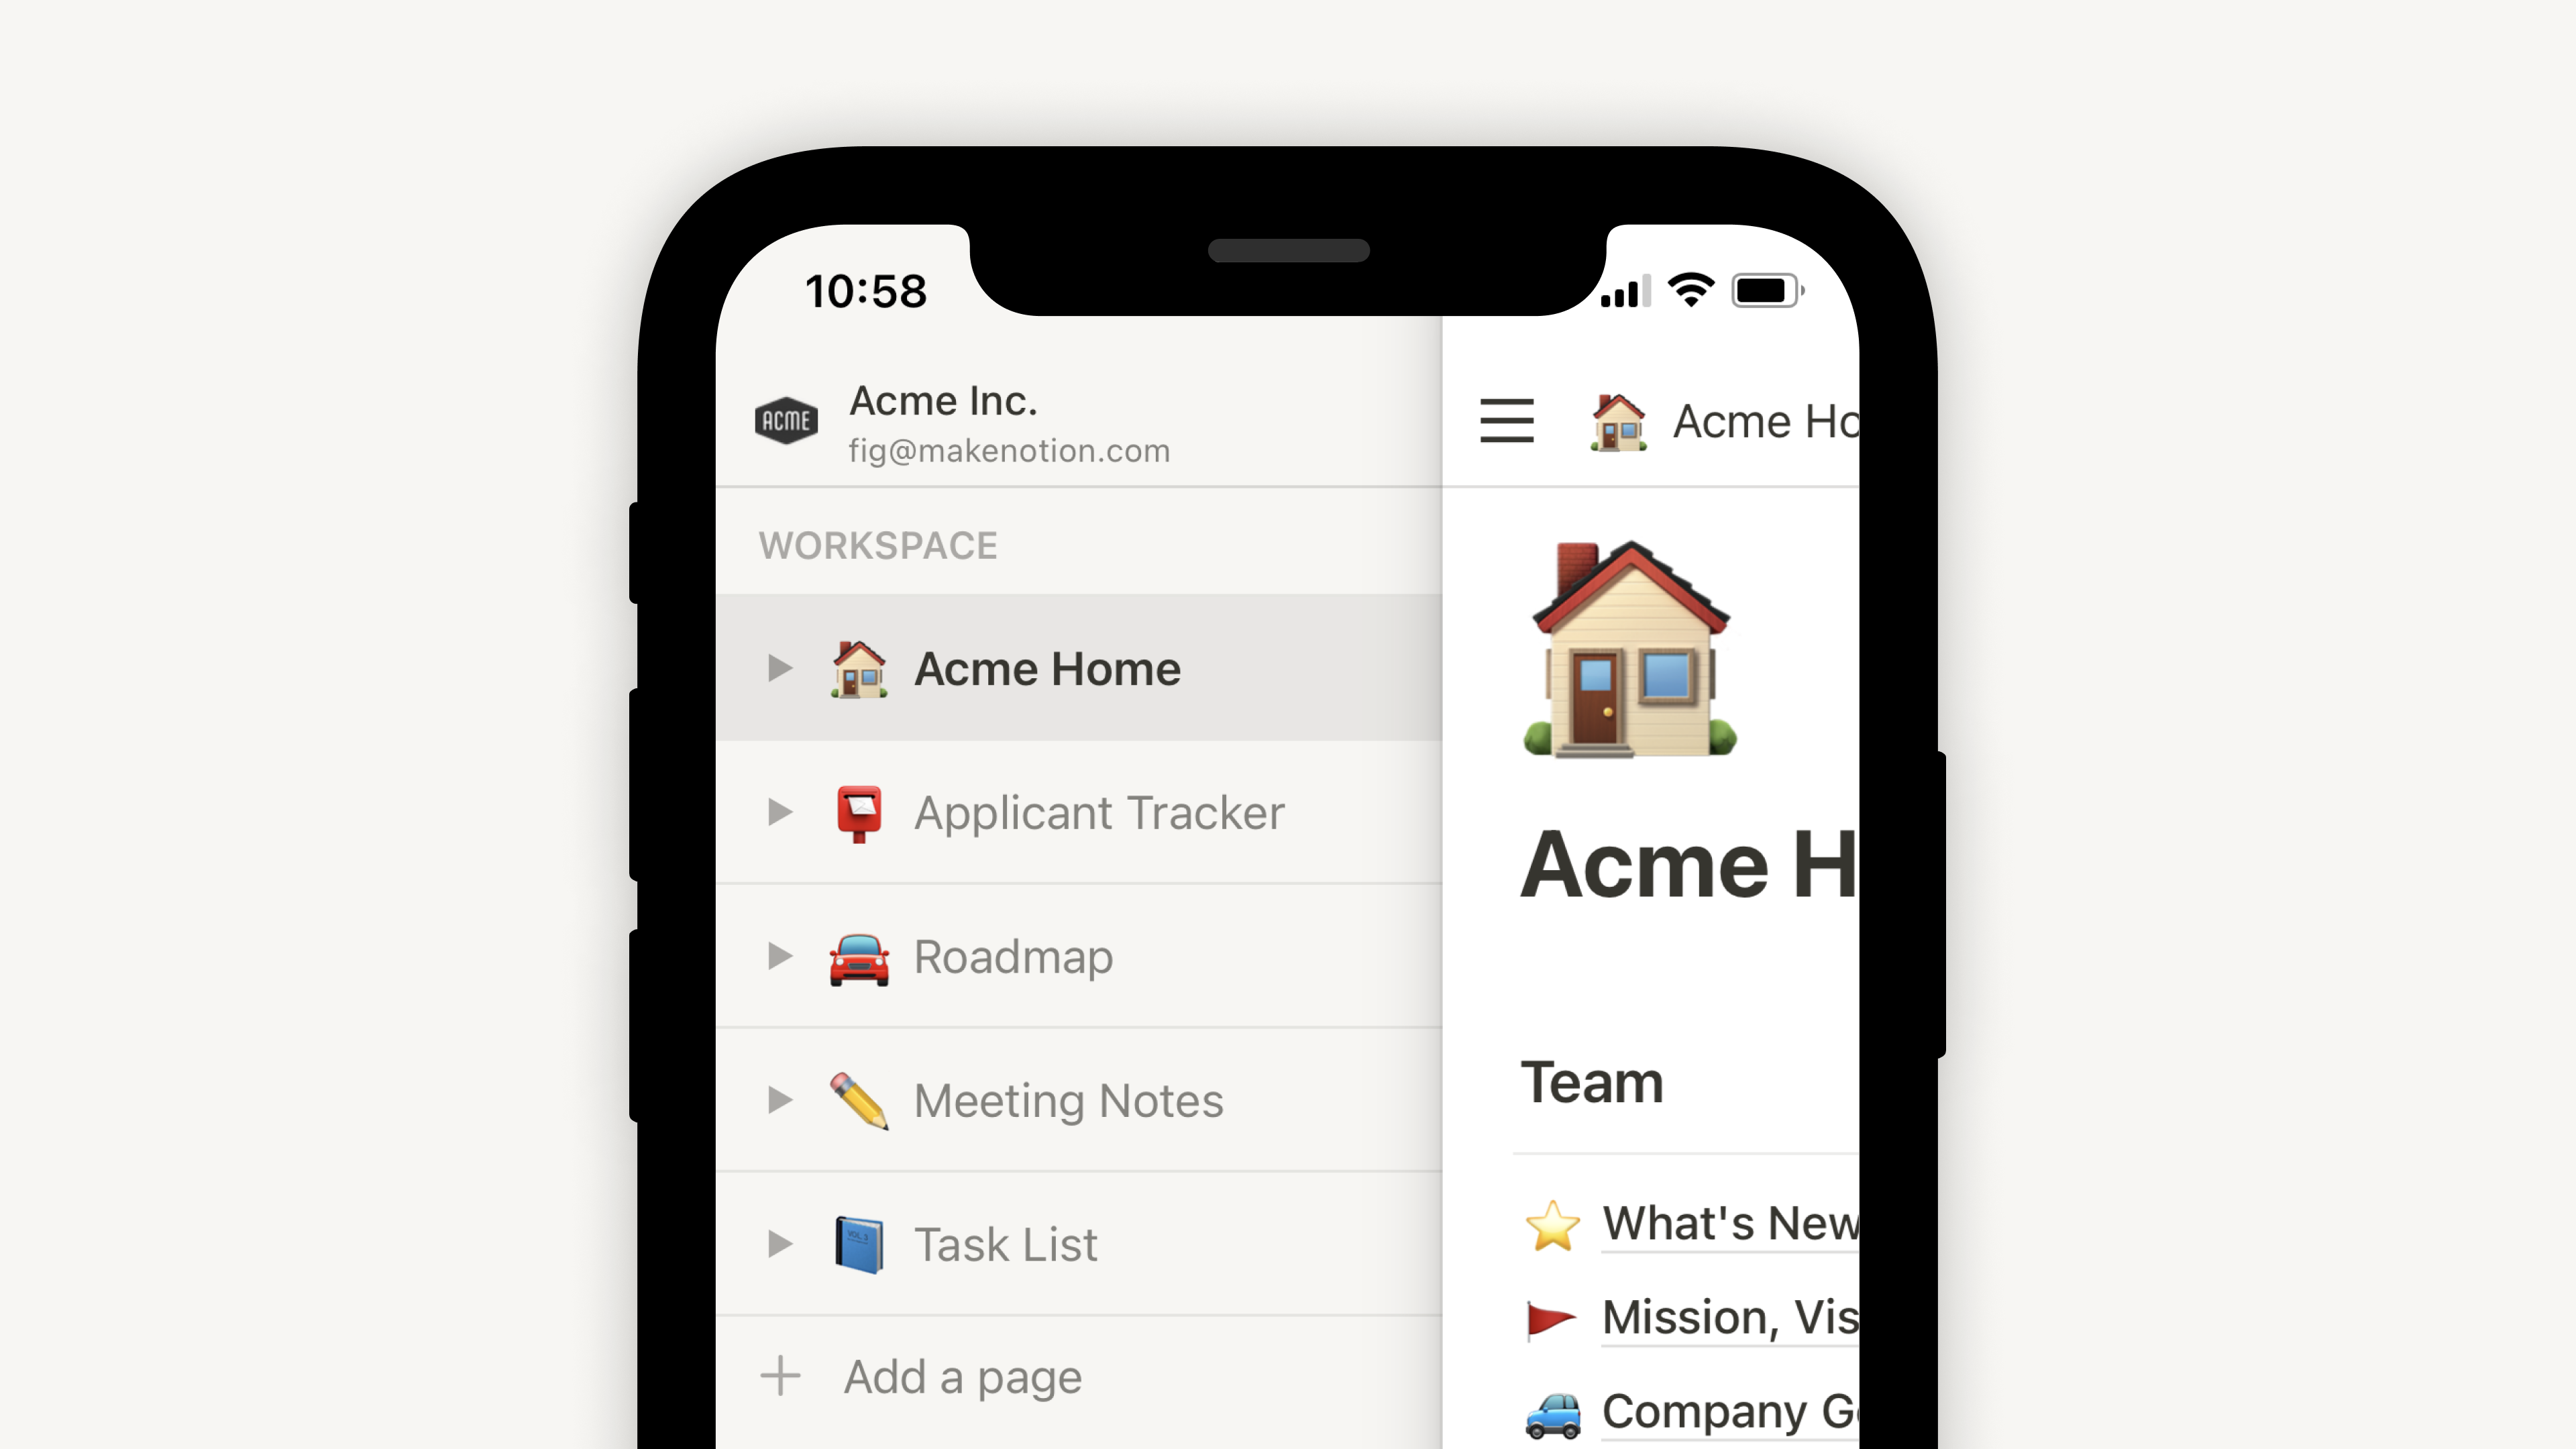
Jump to FAQsYour Notion app interface is split into two sections: the sidebar and the editor.
Sidebar
Notion's expandable sidebar is your navigation system.
All the pages and databases you create will appear here.
The sidebar contains several sections, which you can reorder and customize.
You can nest pages inside each other for infinite levels of organization.
It's also home to your settings, trash, and other tools.
Learn more about your sidebar in this article →
Editor
This is where all the content you create lives.
Control menus are at the top (we'll go through those in more detail), but otherwise, Notion's editor is a blank canvas for you to write, plan, brainstorm, etc.
You'll notice that as soon as you start typing in this space, those top menus fade into the background, leaving you with your thoughts in a spacious zone of focus.
Control panel

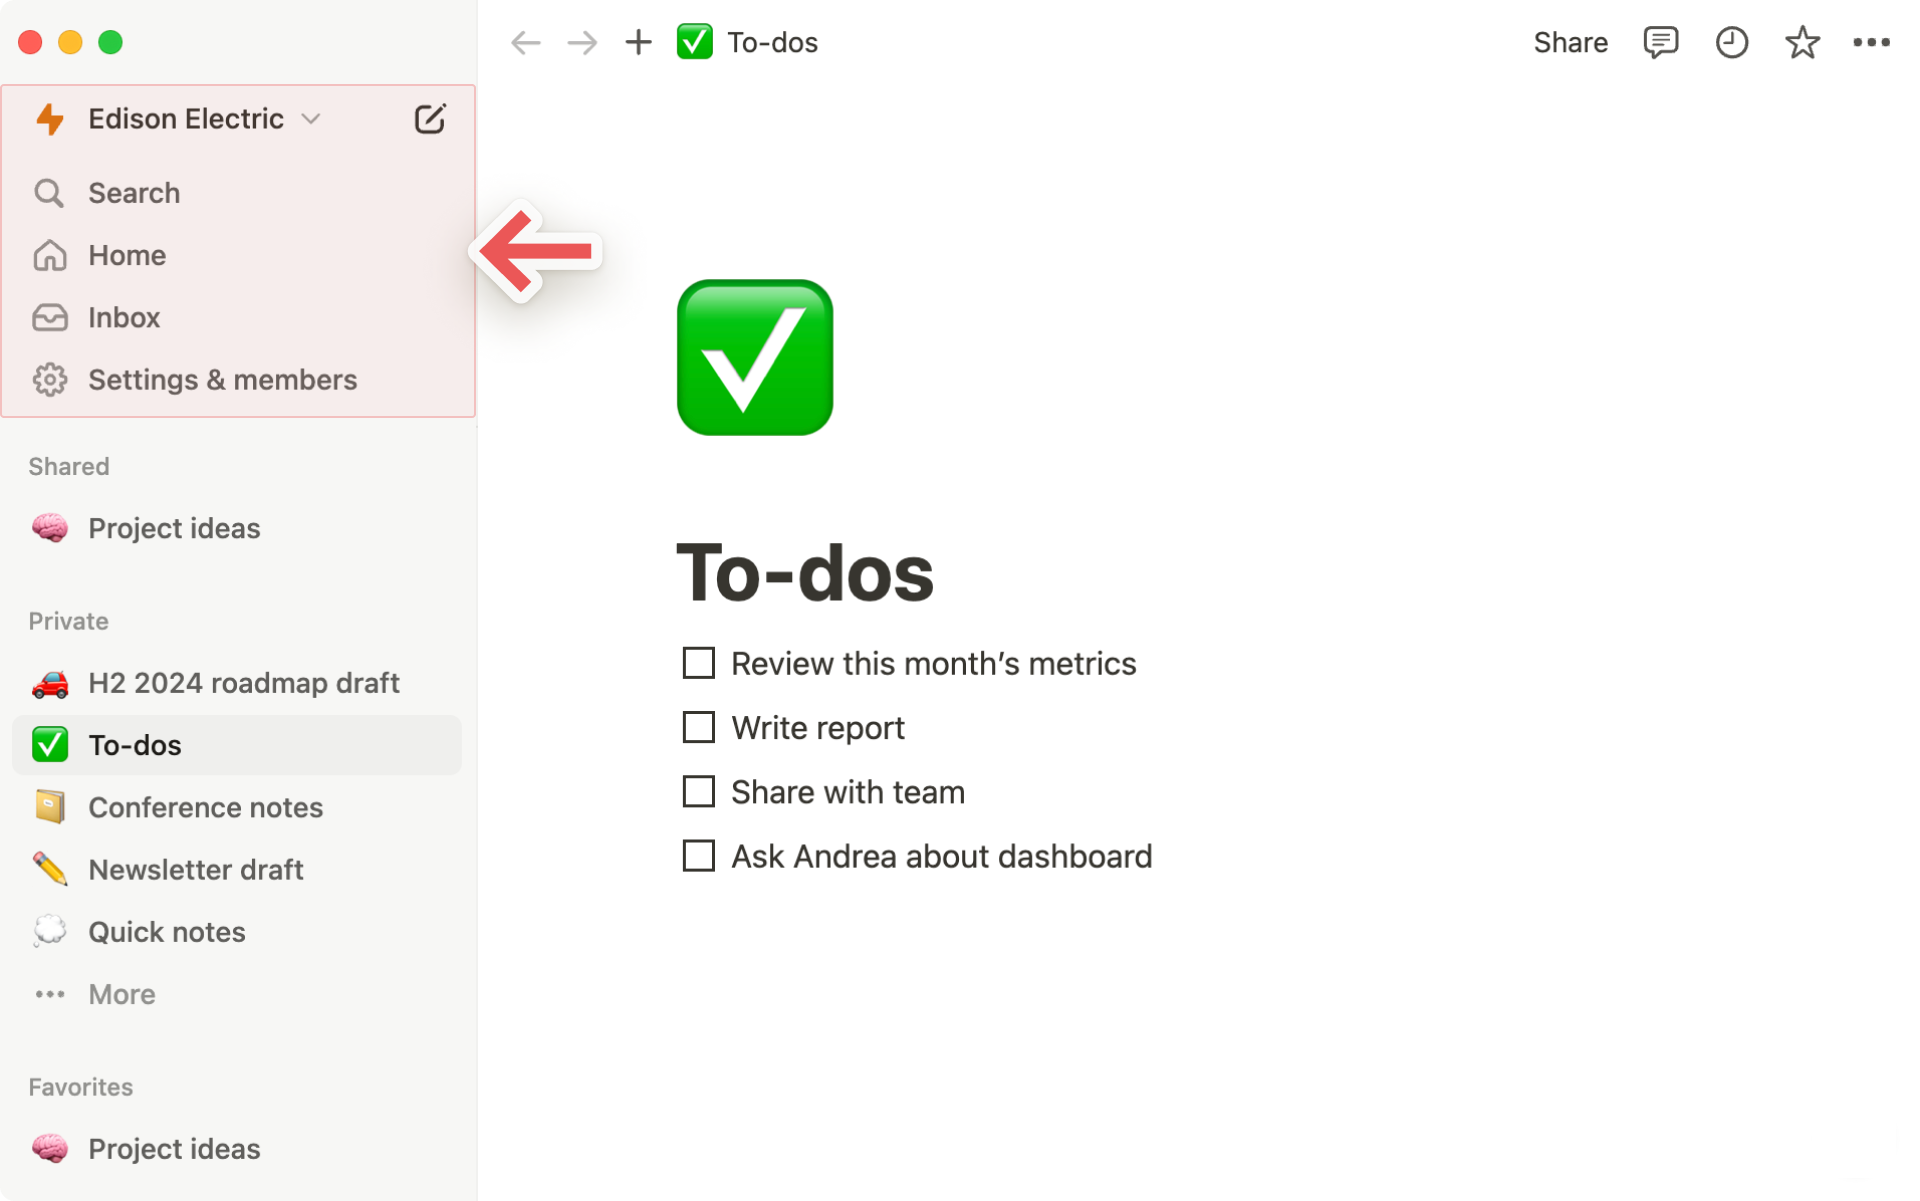
The control panel at the top of your sidebar contains several key features:
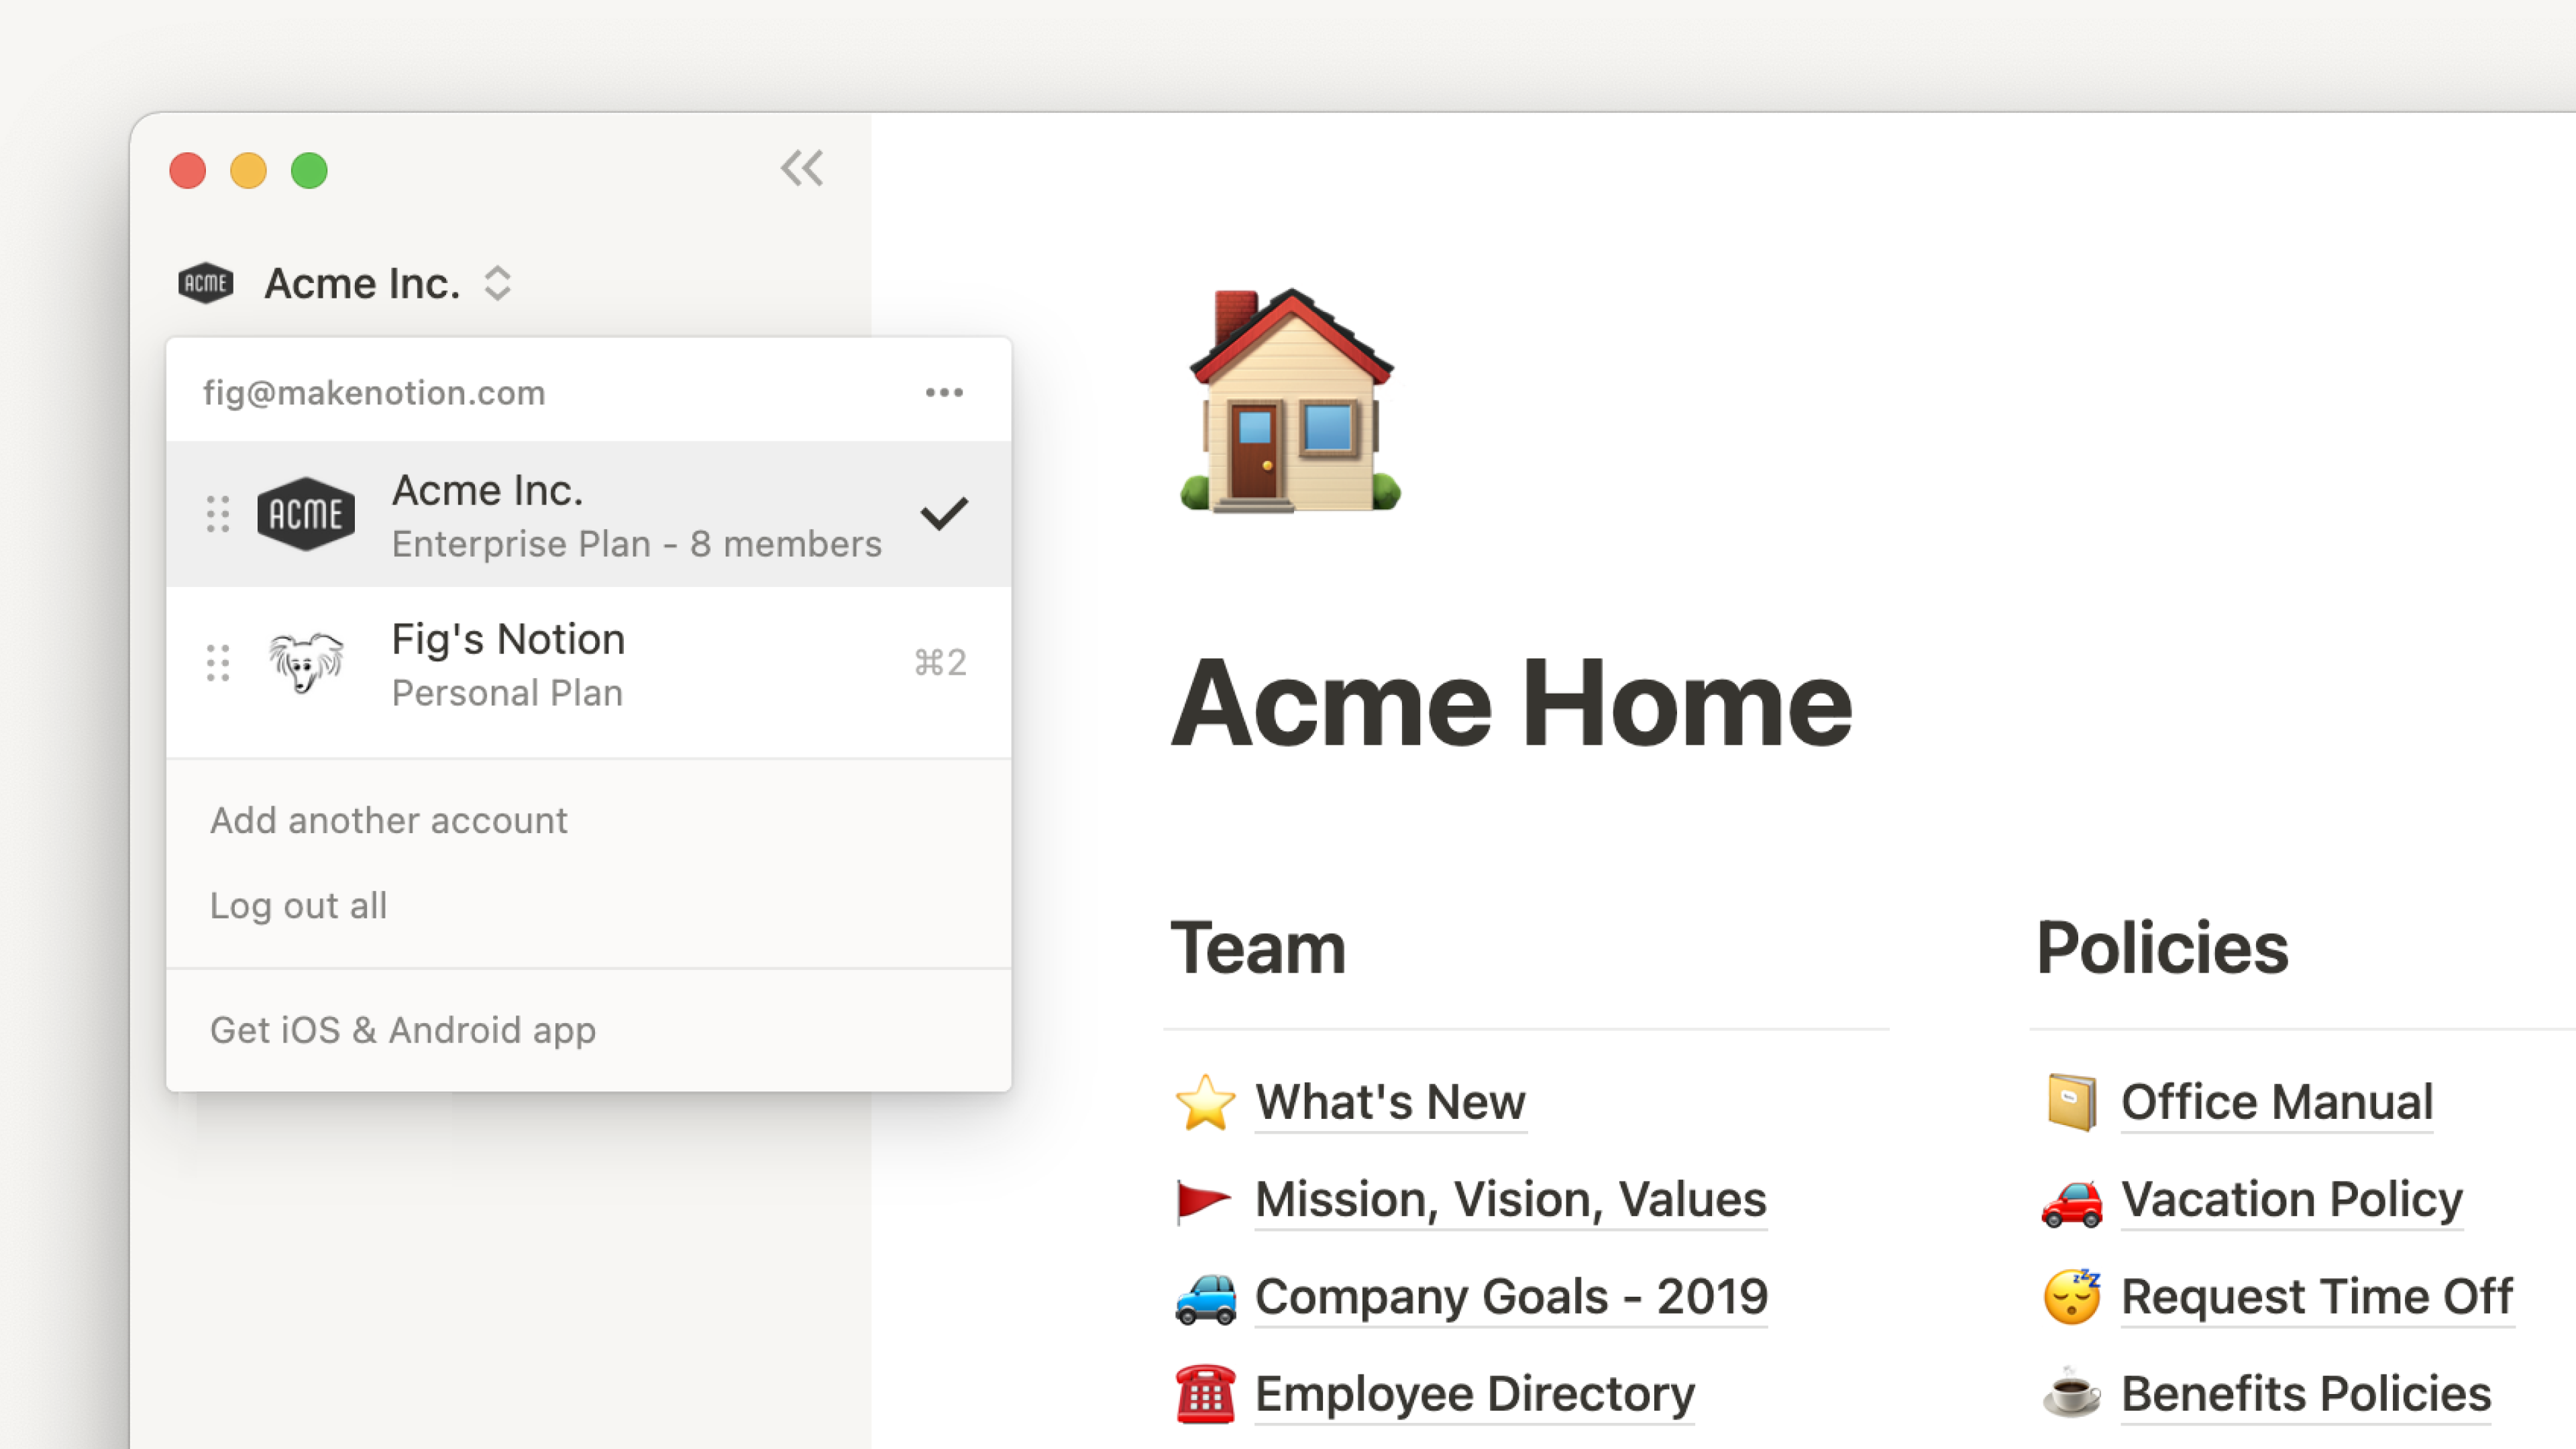
Workspace switcher: Click on your current workspace's name to switch between the workspaces you belong to, create a new one, join another one, or log out. Learn more about switching workspaces here →
Search: Click to open Notion's search window, where you can either type in what you're looking for or quickly jump to a recently visited page. Learn more about Search here →
Home: Click to see the pages and tasks that need your attention. Learn more about Home here →
Inbox: Click to see all your notifications in one place. This menu combines revisions that were made on pages you follow, mentions of you across your workspace, and new work assignments. A red notification badge will appear here when you have unread notifications. Learn more about inbox here →
Sidebar sections

Your sidebar contains various sections to keep your workspace’s content organized:
Teamspace: This section is accessible for users on paid plans to manage the various teams or groups that may be working in Notion. Learn more about teamspaces here →
Shared: This section contains pages that you and select others in your workspace have access to.
Private: This section is home to pages that only you have access to.
Favorites: This section houses pages that you’ve favorited so you can reference them easily.
You can rearrange and customize your sidebar sections. Learn how in this article →

Tip: Click on the name of a sidebar section — Workspace, Shared, or Private — to collapse it and keep your sidebar nice and clean.

Note: If you drag a page from Workspace into Private in your sidebar, everyone but you will lose access.
Templates and trash
Templatesopens our template picker, where you can create a new page using starter content to help you accomplish any one of 50+ jobs.Trashcontains all the pages you delete. You can drag and drop them in here. You can also click on trash to search, view and restore these pages.
Favorites
Favorites is where you can easily access all of the pages most important to you. This section will appear in your sidebar once you favorite your first page.
To add a page to your favorites, navigate to it, then click ⭐ at the top of it. You'll see it appear under Favorites in your sidebar.
To remove a page from your favorites, open it and unclick ⭐ at the top. You can also hover over the page in your sidebar and click •••. You'll see the option to Remove from Favorites.
Vinkki: Lisäämällä sivuja suosikeiksi löydät helposti käynnissä oleviin projekteihisi liittyvät sivut. Voit lisätä ja poistaa sivuja sitä mukaa, kun tarpeesi muuttuvat.
Create a new page
There are a few ways to add a new page in Notion.
Click
New pageat the top of your left sidebar.If you’re on the desktop app, use the shortcut
cmd/ctrl+N.If you’re on mobile, tap
+at the bottom of your screen.
Hover options
When you hover over a page in your sidebar, you'll see both a
+button to add a page nested inside it, and a•••icon, which opens a menu of actions you can apply to the page:Delete,Duplicate,Copy Link,Rename, andMove to.
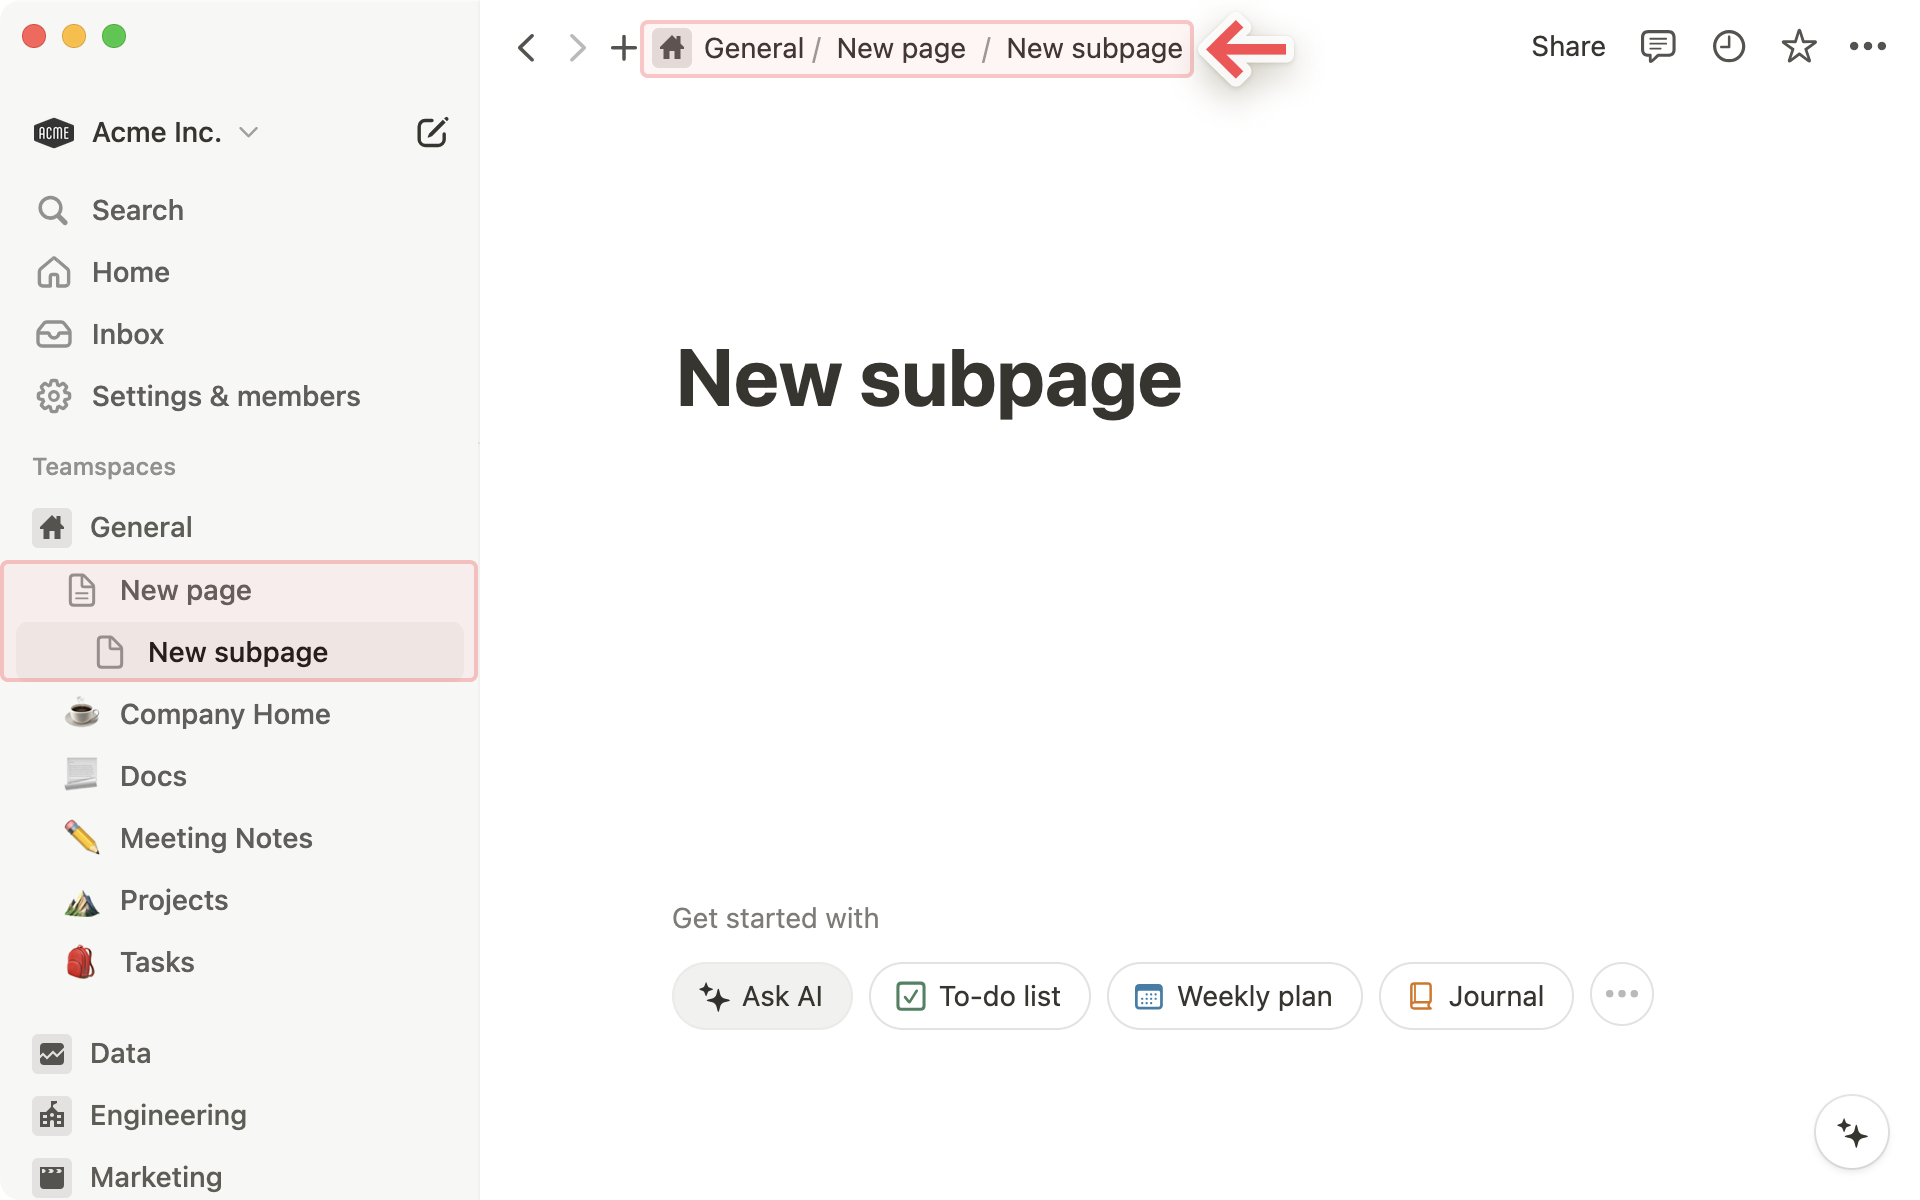
Breadcrumb navigation
Always know where you are in respect to your page structure. See how the page you're currently looking at fits into other pages.
You can click on any page in this breadcrumb to immediately jump to it. Sometimes this will be abridged with a
...— click that to see or go to all the pages in between.
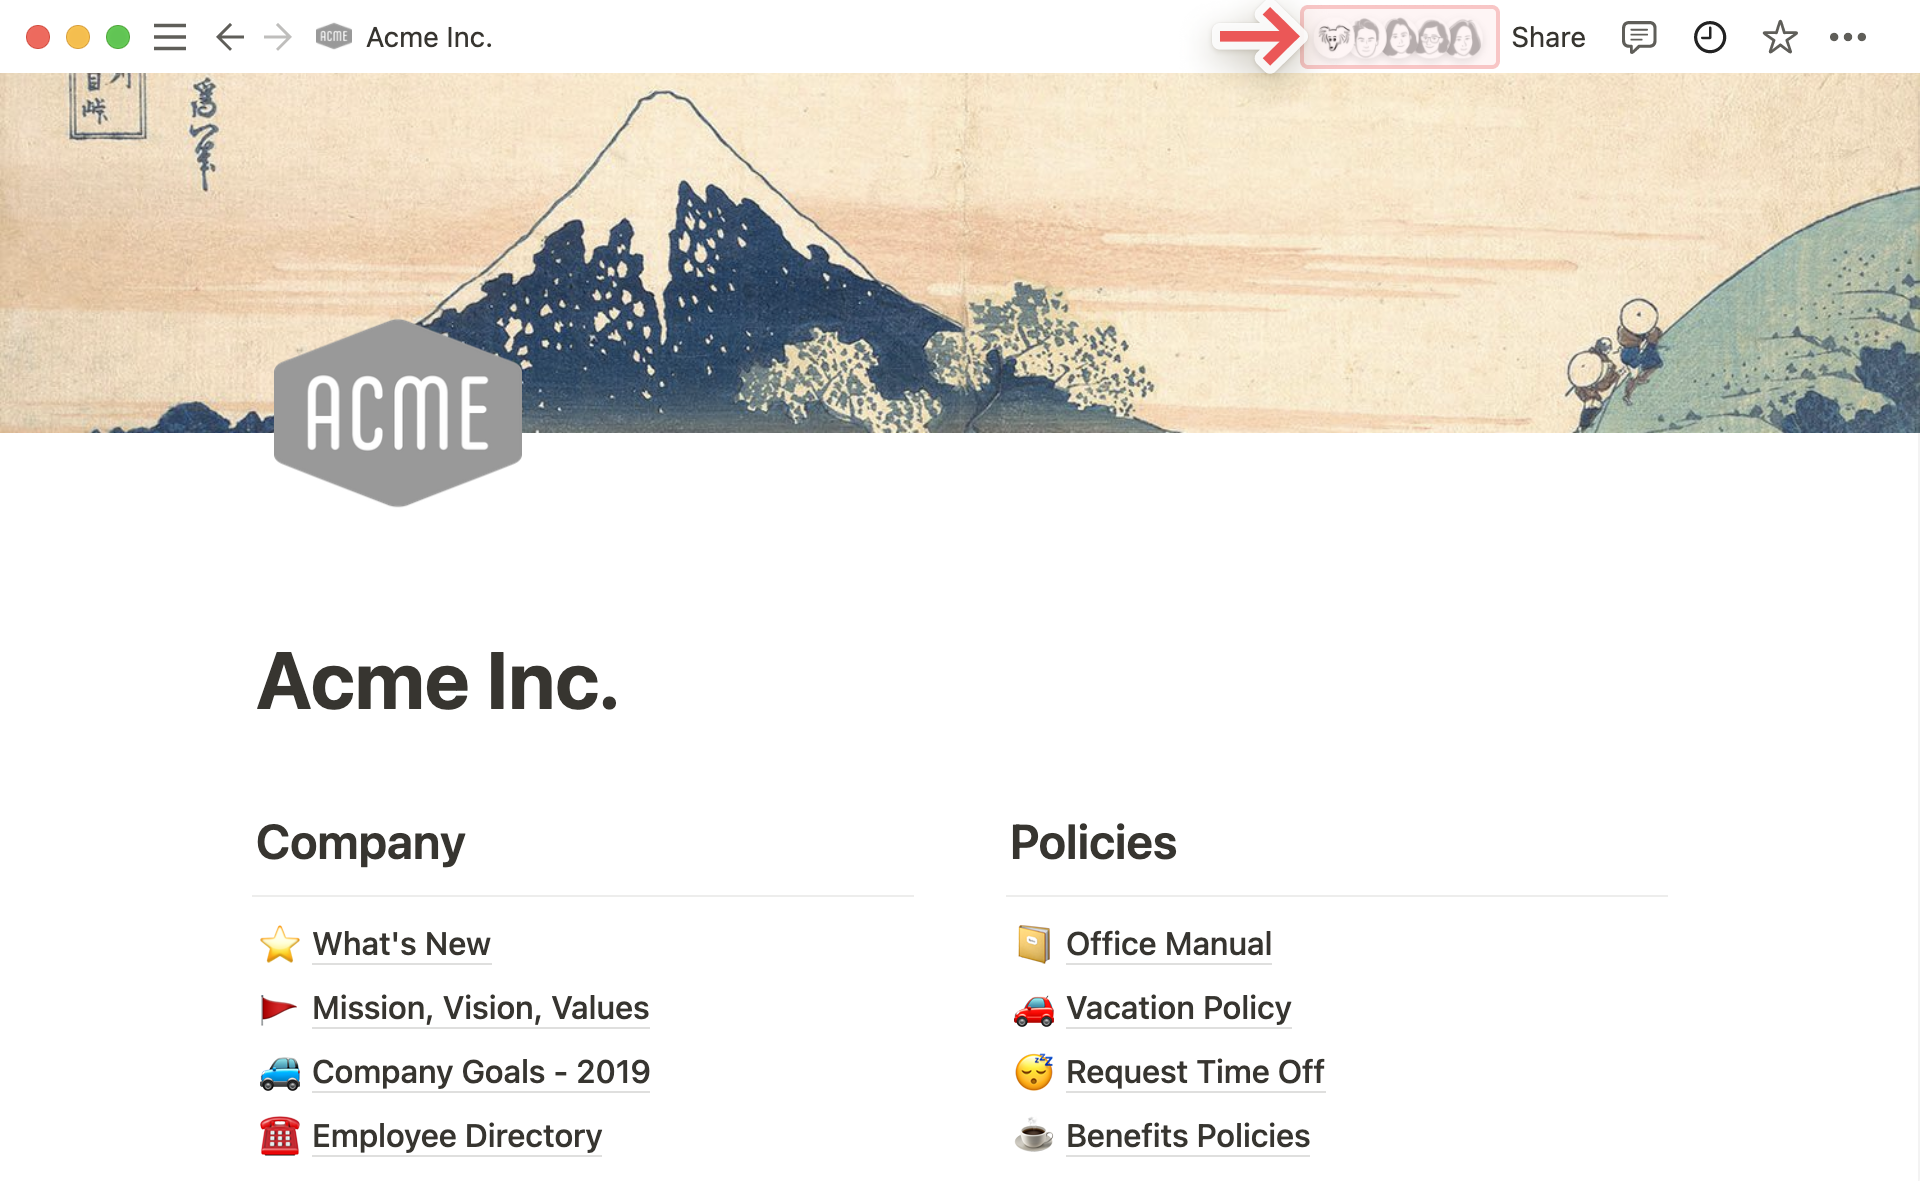
Collaborators
You can see the profile photos of everyone else who has access to the page you're on (sometimes this gets abridged to a notation like
+16 others). If you hover over any of them, you can see the full list, their names, and email addresses.Greyed out avatars are people who are not currently viewing the page but have access to it.
When you collaborate in real-time on the same content, you can see people's photos moving around, corresponding to the block they're reading or editing.
Share menu
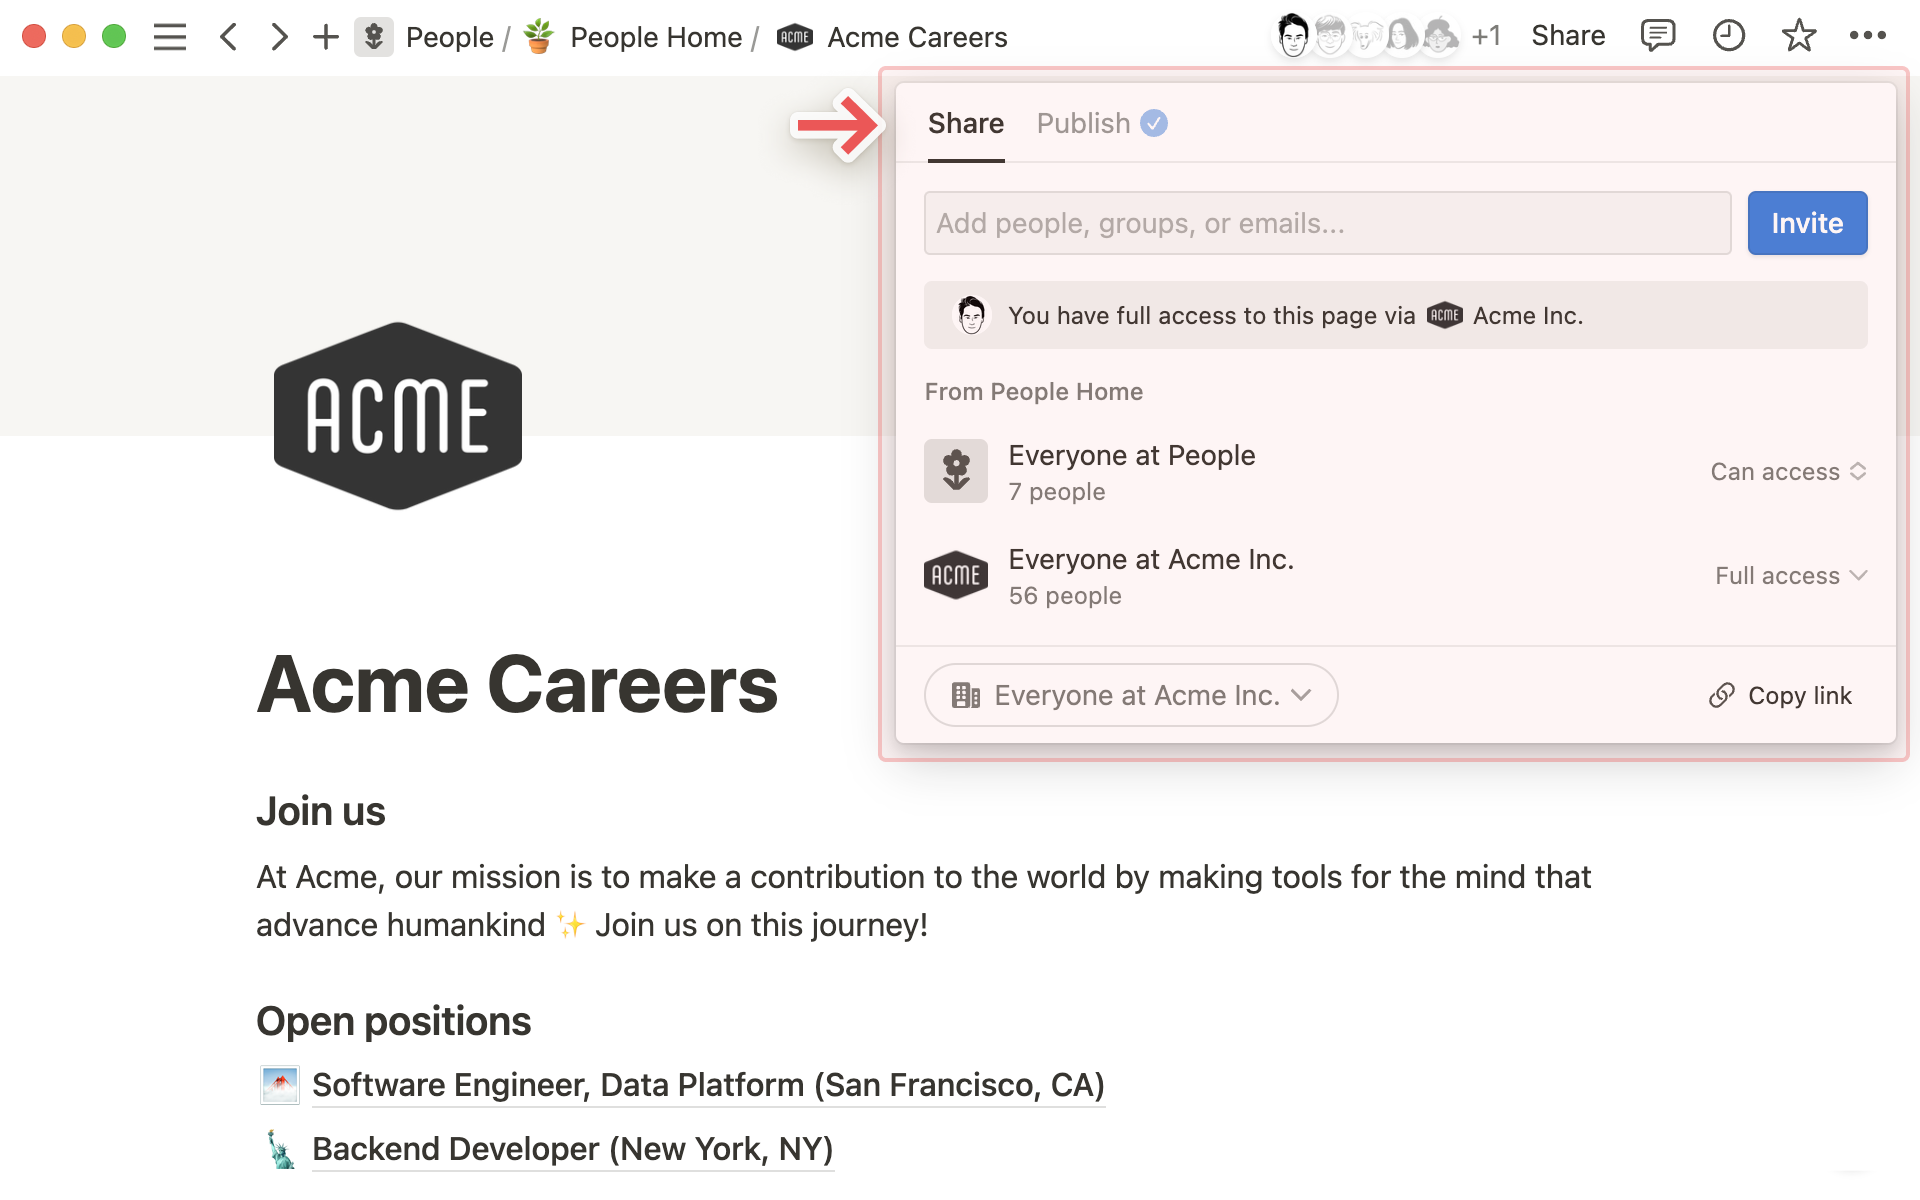
Each row in this menu represents a different person or group of people you can share the page with. In the menu above for this Engineering Wiki page:
Share to webis turned off, so only you and your teammates can see this page.Everyone at Acme Inc.means everyone in the workspace can comment on the page.ada@lovelace.comis an example guest on the page who was invited from outside the workspace — she can only view the page.Figis an example of a team member with full access to the page. They'll be able to make edits and invite additional people.
The dropdown menus on the right let you set their level of access.
Copy linkcopies the page's unique URL to your clipboard so you can share it with whoever you want. Still, only people with access to the page can see it.Invitelets you add people both inside or outside your workspace to a page using their email address. Learn more about sharing here →
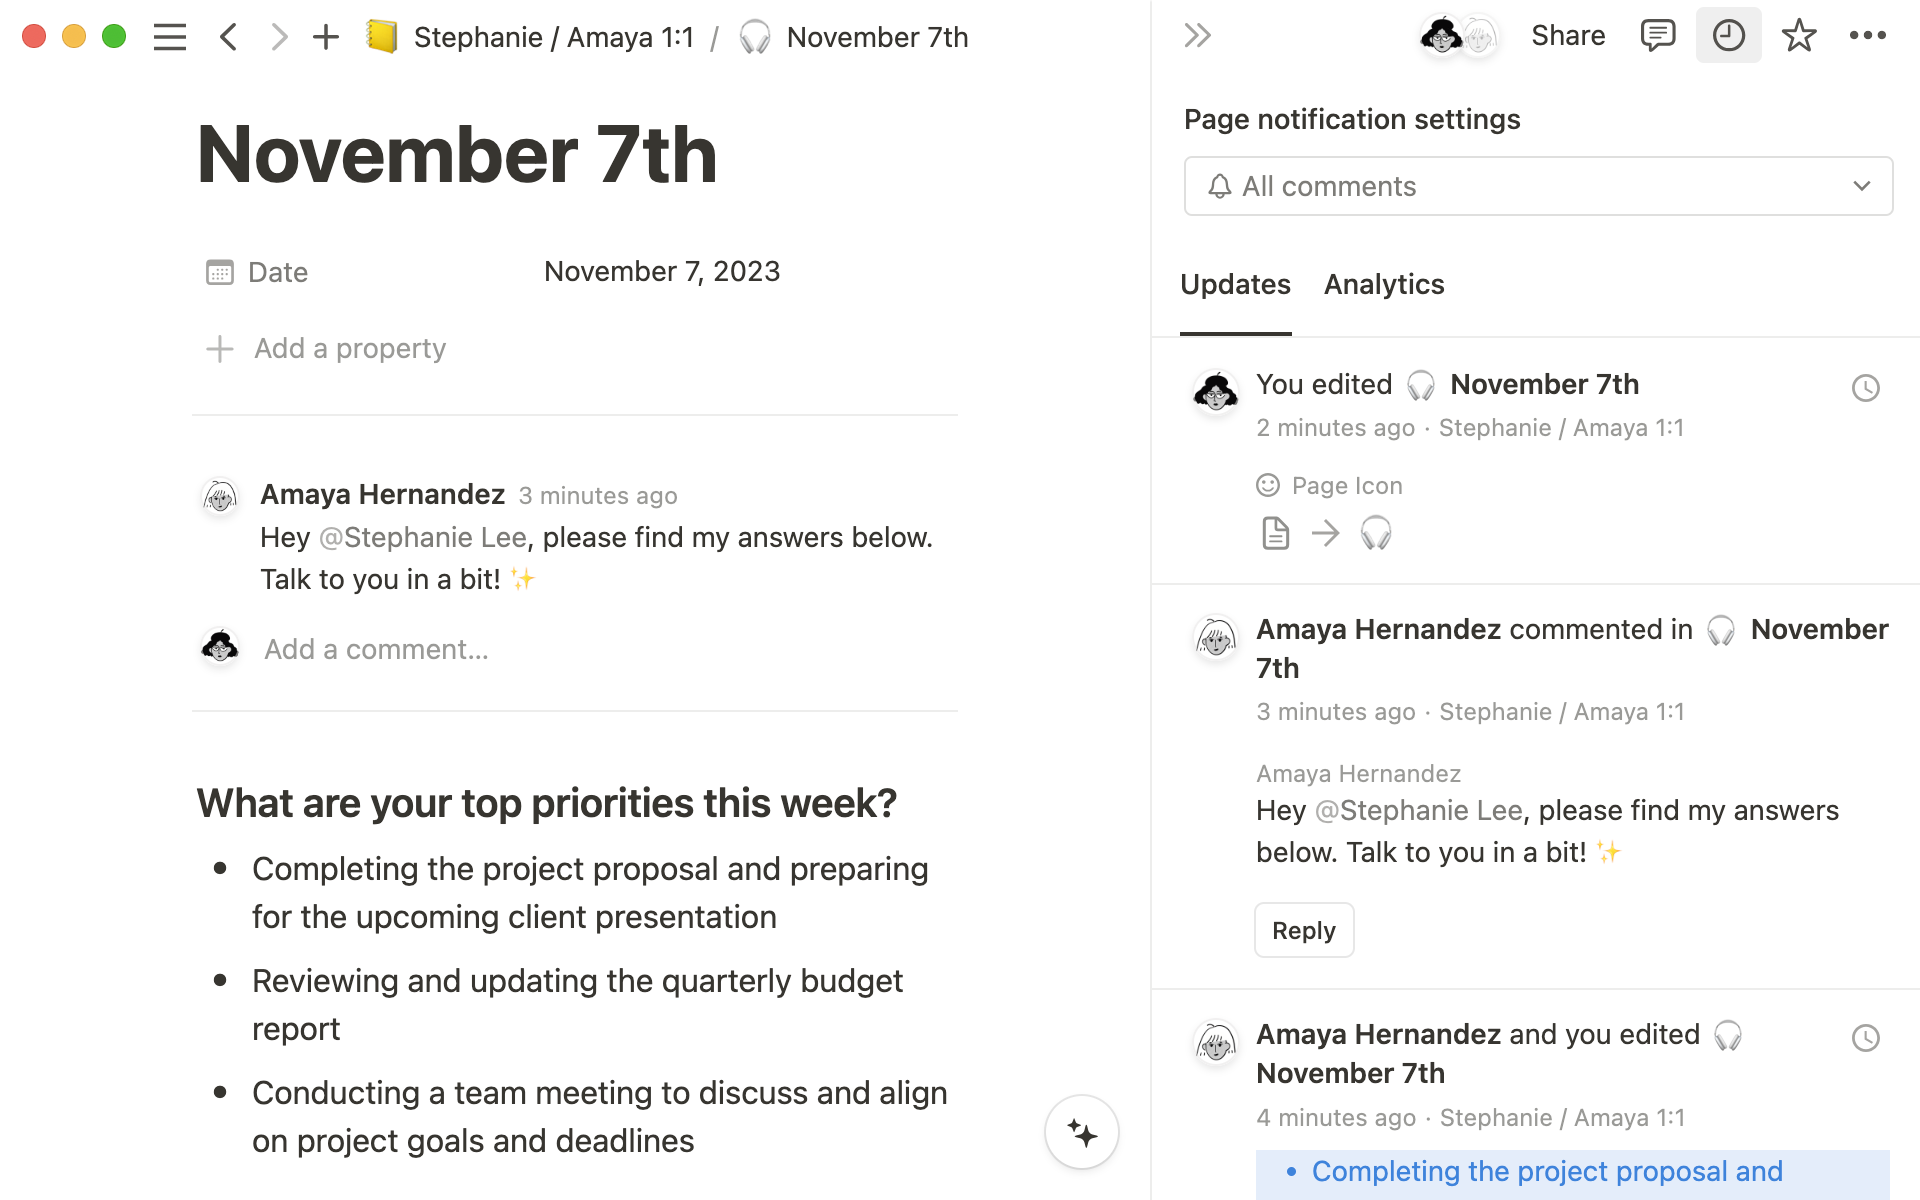
Updates menu
Click the
🕘clock icon to get an overview of all the revisions and comments made on the current page.Click
Followto keep tabs on changes made on the page. You'll see them aggregated across all the pages you follow in theUpdatesmenu in your sidebar.
••• menu

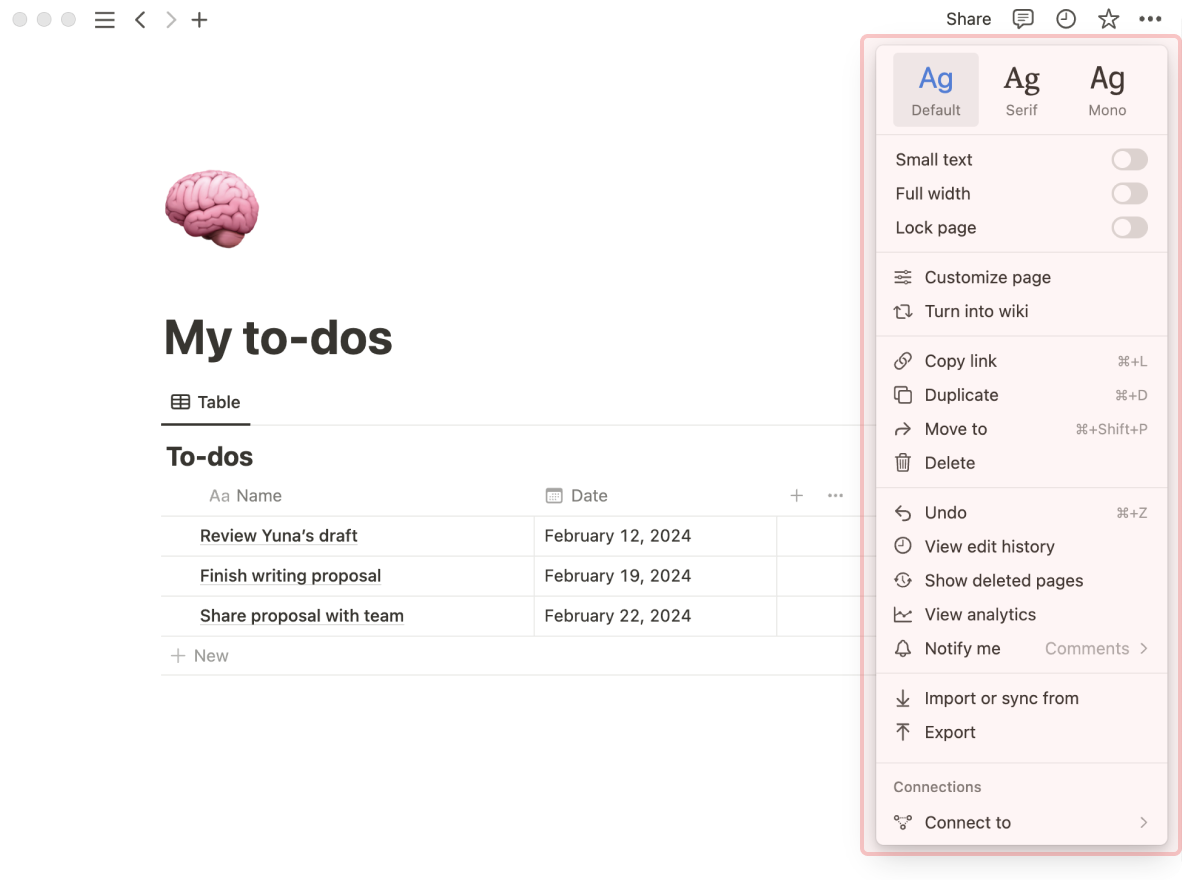
This menu contains many options and actions:
Default,Serif, orMono: Choose from three different typography choices to format your page.Small text: Turn this on to make the type smaller throughout your page.Full width: Turn this on to shrink the right and left margins of the page.Lock page: Turn this on to prevent any edits from being made. This is good for preventing accidental edits on very important pages.Lock database: This option is only available for full-page databases. When you turn this on, people can still enter data, but they can’t change views or properties.Customize page: Toggle the visibility of backlink and page comment sections.Copy link: Copies a link to the page you can share with people who have access.DuplicateDeleteMove to: This opens up a menu where you can choose any other workspace or page to move the current page into.Undo: Reverses the action last taken on the page.View edit history: View past versions of the page going back several days, depending on what plan you're on.Recover pages: Opens upTrashso you can restore or permanently remove sub-pages you've deleted.Import or sync from: You can add documents and data from a number of other apps (Evernote, Trello, Google Docs, etc.) to the page.Export: Download the page as a file to your computer. Databases get saved as CSV files, while non-database pages get saved as Markdown files. You can also export your page or database as PDF or HTML.Merge with CSVConnect toWord countLast edited
Help & support
Click the
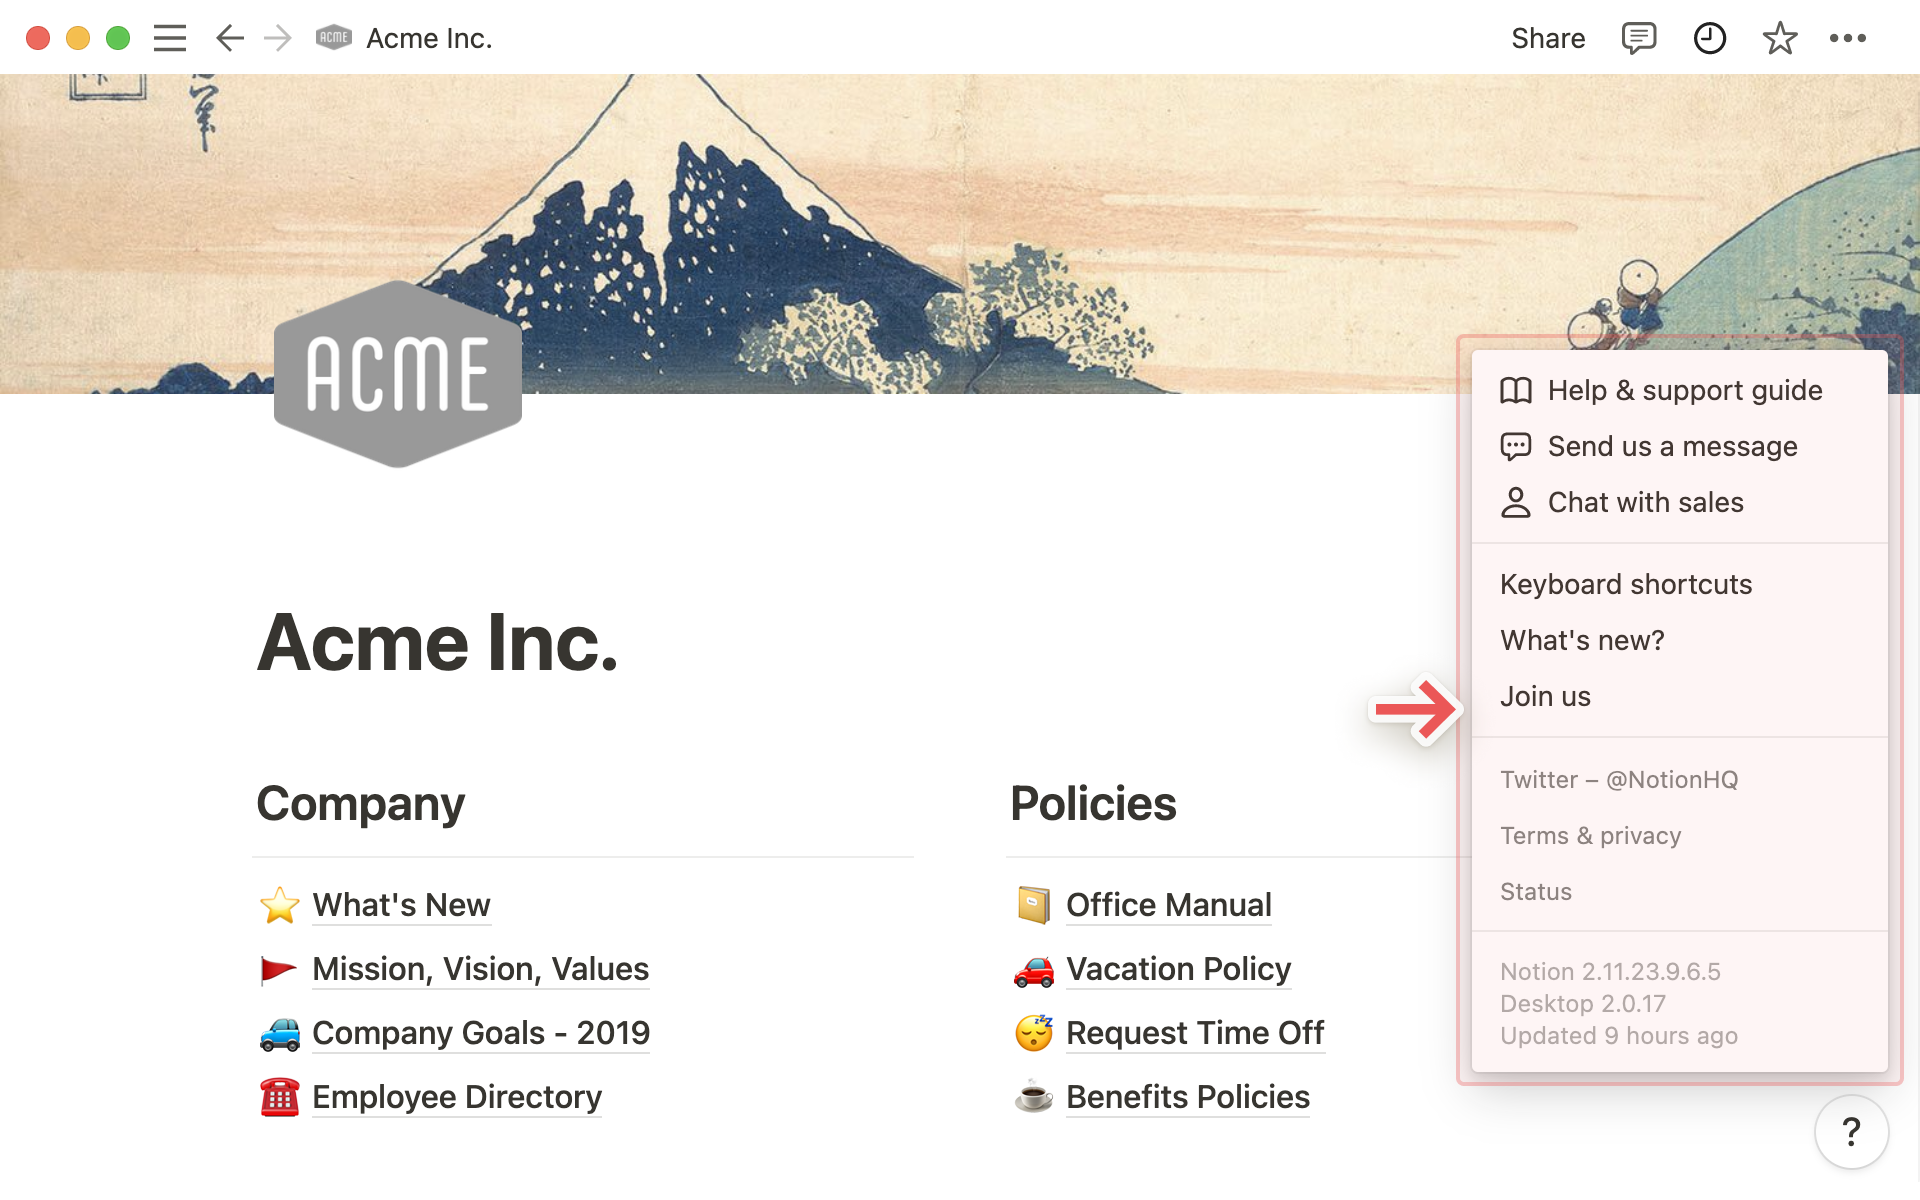
?icon at the bottom right of the window to open Help & Support options.Help & support documentation: Will take you to the Help Center you're reading right now 🤓
Message support: Lets you send a message directly to our support team from the app.
Chat with sales: Ready to upgrade to Plus, Business, or Enterprise? Let us know!
Keyboard shortcuts: A shortcut to seeing all our keyboard and Markdown shortcuts.
What's new?: Release notes for features we've launched, and a peek at upcoming features.
Join us: Job openings at Notion — we're always hiring!
One last reminder that a workspace operates slightly differently if you're using it with a team than if you're using it on your own:
Personal workspaces default to keeping pages private unless they're explicitly shared.
On a team, any page under the
Workspaceheading of your sidebar can be seen and most likely edited by all members of your workspace (unless otherwise specified).Sidebar organization under
Workspaceis also viewable by all members. The page arrangement will look the same to everyone, although individuals can toggle different pages open or closed without affecting everyone's view.On Notion's Plus, Business, or Enterprise Plan, there are members and admins with different levels of permission. Learn more about sharing and permissions here →
Usein kysytyt kysymykset
Voinko siirtyä eri sähköpostiosoitteisiin kuuluvien työtilojen välillä?
Jos haluat lisätä työtiloja toiselta sähköpostitililtä, käytä Notion-ikkunan vasemmassa yläkulmassa olevaa työtilan valitsimen Lisää toinen tili -painiketta ja seuraa ohjeita kirjautuaksesi toiselle tilillesi. Lue lisää täältä →
I clicked the Create or Join Workspace button, but it will only let me create a workspace. How do I join a workspace?
You can only join a workspace via the Create or Join Workspace button if that workspace has the Allowed Email Domains setting enabled, which lets users with your email domain join the workspace automatically.
To join a workspace, you'll need to ask an admin from that workspace to send you an invite.
To add your workspaces from another email account, use the Add another account button in the workspace switcher at the top left of your Notion window, and follow the steps to login to your other account. More on this here →
Sivuvalikossani ei näy osioita. Miten voin ottaa ne käyttöön?
Sivuvalikon osiot vastaavat käyttäjätilisi jakamisasetuksia. Jos työtilassasi on useampi kuin yksi henkilö, sivuvalikkoon tulee näkyviin Työtila-osio, jossa voit työskennellä yhdessä kyseisen henkilön kanssa. Yksityinen-osio on puolestaan tarkoitettu henkilökohtaisille sivuillesi, jotka näkyvät vain sinulle. Voit ottaa nämä osiot käyttöön manuaalisesti valitsemalla minkä tahansa sivun oikeasta yläkulmasta Jaa ja kytkemällä päälle Työtilan käyttöoikeus -valitsimen.
Kun tilaan Plus-sopimuksen, sisältyvätkö kaikki työtilani siihen?
Maksulliset sopimukset sisältävät vain yhden työtilan, eivät koko käyttäjätiliä. Työtilat ovat toisistaan erillisiä, joten niiden välillä ei voi linkittää sisältöä.
Suosittelemme, että pidät työtilojen määrän mahdollisimman pienenä ja hyödynnät sen sijaan sivuvalikon ylätason sivuja järjestyksen ylläpitämisessä.
Miten voin siirtää kaiken Notion-sisältöni toiseen työtilaan?
Huomio: Kaikki siirretyt sisällöt kopioidaan uuteen työtilaan, ja näillä sivuilla esiintyy toisinaan ongelmia. Katso lisätietoja täältä.
Kun haluat siirtää sisältöä työtilasta toiseen samaan käyttäjätiliin liitettyyn työtilaan, valitse sivuvalikosta kunkin ylätason sivun vieressä oleva kohta ••• (tai napsauta hiiren oikeaa painiketta) ja valitse sitten Siirrä kohteeseen. Näkyviin tulee vaihtoehto siirtää sisältöä toiseen työtilaan.
Kun siirrät ylätason sivuja, myös kaikki alasivut siirtyvät mukana. Ne näkyvät Yksityinen-osiossa, mutta voit siirtää ne minne haluat.
Mitä jos vahingossa poistin jotain pysyvästi? Voiko sitä palauttaa mitenkään?
Jos poistat vahingossa sivun, työtilan tai koko käyttäjätilisi, autamme mielellämme. Vahinkoja sattuu 😅 Lähetä meille viesti sovelluksessa napsauttamalla työpöydän vasemmassa alakulmassa (tai mobiililaitteen sivuvalikossa) kohtaa ?. Voit myös lähettää sähköpostia osoitteeseen team@makenotion.com.
Säilytämme tietokannastamme varmuuskopioita, joten voimme tarvittaessa palauttaa tilannevedoksen sisällöstäsi viimeisten 30 päivän ajalta.
Kuinka kirjaudun ulos Notion-käyttäjätililtäni?
Napsauta nykyisen työtilan nimeä sivuvalikon vasemmassa yläkulmassa. Vieritä sivua alaspäin, niin näet sähköpostiosoitteesi vieressä vaihtoehdon Kirjaudu ulos.
Jos käytät mobiililaitetta, napauta ylhäällä vasemmalla olevaa ☰-kuvaketta. Napauta sitten valikon yläosassa olevaa työtilan valitsinta. Napauta alhaalla olevaa kohtaa Kirjaudu ulos.