A generation of pioneers (Doug Engelbart, Ted Nelson, Alan Kay, and many more) saw the computer as tool to augment human problem-solving by giving people power over information.
Today, that information mostly remains siloed across tools. Take cloud-based document editors, where pages are their smallest atomic unit. Information is locked inside of pages and files and folders — that’s reminiscent of how things were done a century ago.
We built Notion on a framework that allows information to stand on its own, free from any constraint or container, instead putting the power in the hands of the user at a granular level. That framework is built on blocks.
Everything you see in Notion is a block. Text, images, lists, a row in a database, even pages themselves — these are all blocks, dynamic units of information that can be transformed into other block types or moved freely within Notion. They’re the LEGOs we use to build and model information. And when put together, blocks are like LEGO sets, creating something much greater than the sum of their parts.
This flexibility is at the heart of Notion’s mission. While blocks require our engineering team to apply extreme rigor when structuring information, we wanted an atomic, graph-like data model to provide our users with the ability to customize how their information is moved, organized, and shared.
The block model makes Notion unique, and it’s the foundation for how Notion thinks about bringing to life what pioneers thought computing, as a medium, could become.
Block basics
Much like LEGO blocks in a LEGO set, Notion blocks are the singular pieces that represent all units of information inside the Notion editor. The attributes of a block determine how that information is rendered and organized.
Every block has the following attributes:
ID — each block is uniquely identifiable by its ID. You can see the ID of page blocks at the end of the URL in your browser. We use randomly-generated UUIDs (UUID v4) for IDs in Notion.
Properties — a data structure containing custom attributes about a specific block. The most common property is
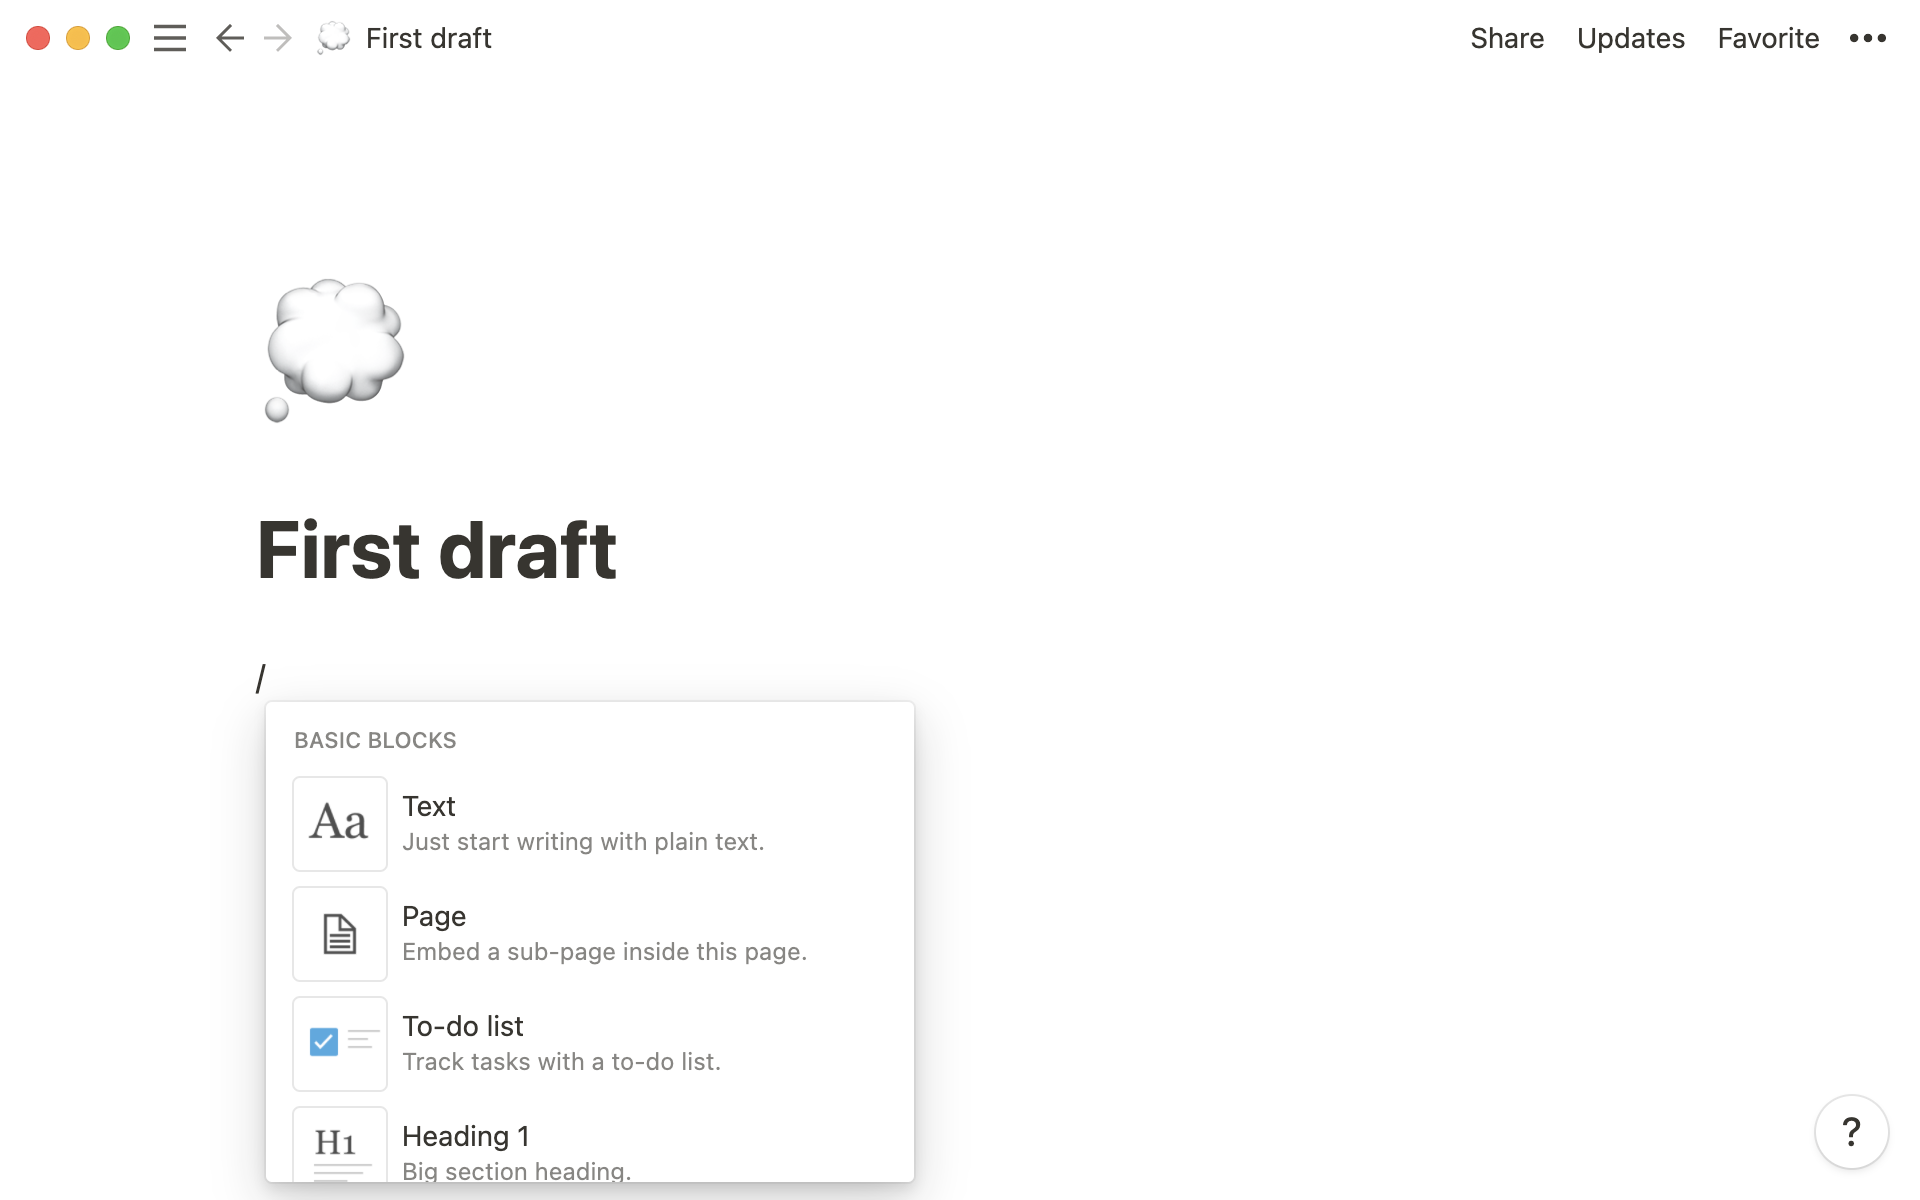
title, which stores the text content of block types like paragraphs, lists, and of course, the title of a page. More elaborate block types require additional or different properties, like a page block in a database with user-defined properties.Type — every block has a type, which defines how a block is displayed, and how the block’s properties are interpreted. Notion supports many types of blocks, most of which you can see in the “new block” menu that appears when you press the
+button or in the/menu:
In addition to the attributes that describe the block itself, every block has attributes that define their relationship with other blocks:
Content — an array (or ordered set) of block IDs representing the content inside this block, like nested bullet items in a bulleted list or the text inside a toggle.
Parent — the block ID of the block’s parent. The parent block is only used for permissions.
How blocks fit together
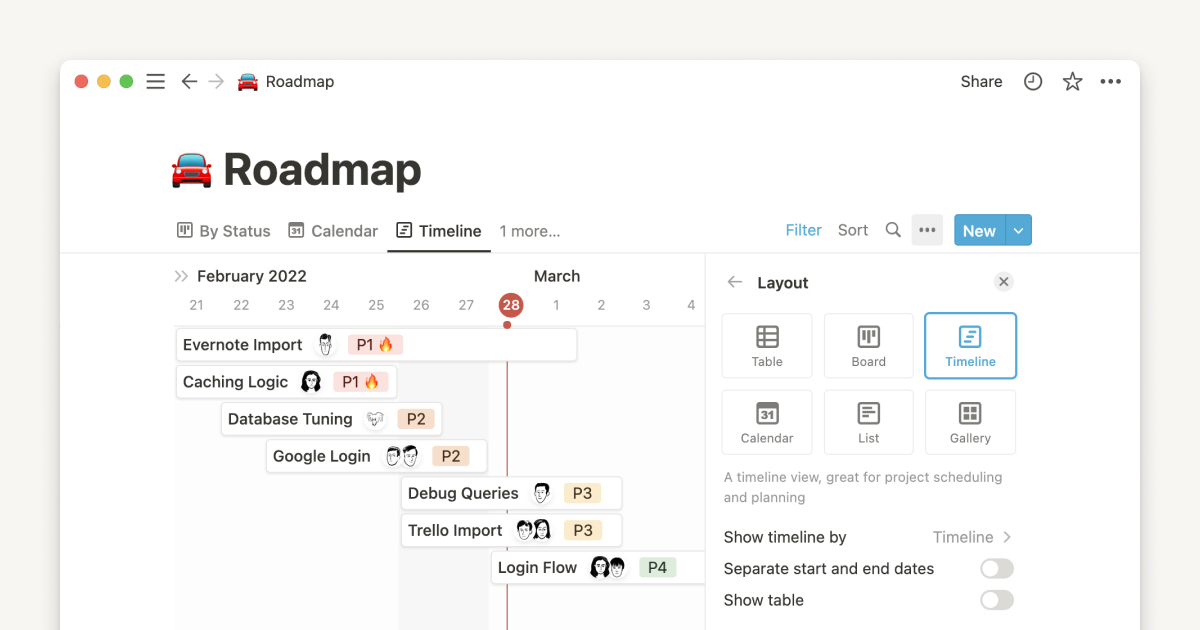
Like LEGO blocks, Notion blocks can be combined with other blocks to make something much more powerful — like a roadmap that’s been totally customized to your team’s process, tracking progress and holding all project information in one place. We organize all aspects of blocks to make sure they do the right things and live in the right places, enabling users to connect them and further tailor Notion to solve their problems.
Type and properties
The block type is what specifies how the block is rendered in Notion’s UI — and depending on that type, we interpret the block’s properties and content differently. You may be familiar with this if you've used the Turn into function in Notion, which allows you to turn one block type into another.
Changing the type of a block doesn’t change the block’s properties or content — it only changes the type attribute. The information is just rendered differently, or even ignored if the property isn’t used by that block type.
For example, you can see here that a To-do list block is transformed into several other block types. We also check that To-do list item. The “checked” property of the To-do list block is ignored when the block is transformed into Heading and Callout block types — but by the time we come full circle to turn the block back into a To-do list block, it is still checked.
Decoupling property storage from block type allows for efficient transformation and changes to our rendering logic. But it’s also essential for collaboration, because we preserve as much user intention as possible.
Content and the render tree
The flexibility of the block model also allows blocks to be nested inside of other blocks, like text inside a toggle or infinitely nested sub-pages inside of pages. The content attribute of a block is what stores the array of block IDs (or pointers) referencing those nested blocks.
In the to-do list example, we have a To-do list block (“Write a blog post about blocks”) with three block IDs in its content array. We think of these IDs as “downward pointers,” and call the blocks that they refer to “content” or “render children.”
Each block defines the position and order in which its content blocks are rendered. We call this hierarchical relationship between blocks and their render children the “render tree.” But, it doesn't look like a tree with branches — different block types render their children in different ways.
Here are a few examples of how the content attribute is rendered by different block types:
List blocks —
Text,Bulleted list, andTo-do list. List blocks display their content indented.Toggles —
Toggle listblocks only display content when expanded. Otherwise, they only display the title property.Pages —
Pageblocks display their content in a new page, instead of rendering it indented in the current page. To see this content, you would need to click into the new page.
Structurally, this continues to bring power to your information by allowing you to manipulate blocks at the most granular level. It’s a concept that preserves user intent of how information should be organized and displayed when working with other information.
Editing the render tree
Have you ever been surprised by how indentation works in Notion? In conventional word processors, indentation is presentational: it only affects the spacing of text from the margins. In Notion, indentation is structural: it’s a reflection of the structure of the render tree. In other words, when you indent something in Notion, you are manipulating relationships between blocks and their content, not just adding a style.
For example, pressing indent in a content block tries to add that block to the content of the nearest sibling block in the content tree.
Most of the time, indenting works like it would in a traditional document editor — the currently-selected block will move into the content array of the preceding block, and will be rendered indented within. However, when the preceding block isn’t a list (or there’s no previous block at all), indenting will have no effect because there is nowhere to move the block into. The visual representation of a document in Notion reflects the structure of the information it contains.
Permissions
So far, we’ve explained how blocks come together to organize and structure your information. It’s also important to understand how this structure protects your information so only the right people can read it or change it.
Blocks inherit permissions based on the blocks in which they’re located (which are above them in the tree). Consider a page — to read its contents, you must be able to read the blocks within that page. However, there are two reasons we can’t use the content array to build this permissions system:
Initially, we allowed blocks to be referenced by multiple content arrays to simplify our collaboration and concurrency model. But because a block can be referenced in multiple places, it’s ambiguous which block it would inherit permissions from. And ambiguity is unacceptable in a permissions system.
The second reason is mechanical. To implement permission checks for a block, we need to look up the tree, getting that block’s ancestors all the way up to the root of the tree (which is the workspace). Trying to find this ancestor path by searching through all blocks’ content arrays is inefficient, especially on the client.
Instead, we use an “upward pointer” — the parent attribute — for the permission system. The upward parent pointers, and the downward content pointers mirror each other (outside of a few edge cases we’re working to clean up).
Life of a block
A block’s life starts on the client.
When you take an action in the UI — typing in the editor, dragging blocks around a page — these changes are expressed as operations that create or update a single record. Our team refers to “records” as any kind of persisted data in Notion, like blocks, users, workspaces, etc. And because many actions usually change more than one record, operations are batched into transactions that are committed (or rejected) by the server as a group.
Let’s say you're working inside a page with a friend, both on separate computers editing a to-do list. What happens behind the scenes?
Creating and updating blocks
You press enter — this creates a new To-do block.
First, the client defines all the initial attributes of the block, generating a new unique ID, setting the appropriate block type (to_do), and filling in the block’s properties (an empty title, and checked: [["No"]]). It builds operations to represent the creation of a new block with those attributes.
New blocks are not created in isolation: blocks are also added to their parent’s content array, so they’re in the right position in the content tree. So, the client also generates an operation to do so. All these individual change operations are grouped into a transaction.
Then, the client applies the operations in the transaction to its local state. New block objects are created in-memory and existing blocks are modified. On our native apps, we cache all records you access locally in an LRU (least recently used) cache on top of SQLite or IndexedDB called RecordCache. When you change records on a native app, we also update the local copies in RecordCache. The editor re-renders to draw the newly created block onto your screen. This happens within a few milliseconds of your keypress.
At the same time, the transaction is saved into TransactionQueue, the part of the client responsible for sending all transactions to Notion’s servers so your data is persisted and shared with collaborators. TransactionQueue stores transactions safely in IndexedDB or SQLite (depending on platform) until they’re persisted by the server or rejected.
Saving changes on the server
Here’s how your block ends up saved safely on the server, so your friend can see it.
Usually, TransactionQueue sits empty, so the transaction to create the block is sent to Notion’s server right away in an API request. The transaction data is serialized to JSON and posted to the /saveTransactions API endpoint.
SaveTransaction’s main job is to get your data into our source-of-truth databases, which store all block data, as well as all other kinds of persisted records in Notion.
Once the request reaches the Notion API server:
We load all the blocks and parents involved in the transaction. This gives us a “before” picture in memory. For this example, remember that we’re creating a block. So we need to, at least, load the page block so that we can insert the newly created block’s ID into the page’s content array.
We duplicate the “before” data that had just been loaded in memory. Then, we apply the operations in the transaction to the new copy to create the “after” data.
Then we use both “before” and “after” data to validate the changes for permissions and data coherency. If everything checks out (it usually does), all created or changed records are committed to the database — meaning your block has now officially been created.
At this point, there’s a “success” HTTP response to the original API request that had been sent by your client. This confirms your client knows the transaction was saved successfully and that it can move onto saving the next transaction in the TransactionQueue.
In the background, we schedule additional work depending on the kind of change made for your transaction. For example, we schedule version history snapshots and indexing block text for Quick Find. Importantly, we also notify MessageStore — Notion's real-time updates service — about the changes you made.
We’ll cover how the data gets to your friend’s screen in the next section.
Real-time updates
You pressed enter, created a new block, and now your block shows up on your friend’s screen. How does that work?
Every client has a long-lived WebSocket connection to MessageStore, Notion’s real-time updates service. When the Notion client renders a block (or page, or any other kind of record), the client subscribes to changes of that record from MessageStore using this WebSocket connection. When your friend opens the same page as you, they’re subscribed to changes of all those blocks.
After your changes made it through the saveTransactions process, the API notified MessageStore of new recorded versions. MessageStore finds client connections subscribed to those changing records, and passes on the new version to them through their WebSocket connection.
When your friend’s client receives version update notifications from MessageStore, it verifies that version of the block in its local cache. Because the versions from the notification and the local block are different, it sends a syncRecordValues API request to the sever with the list of outdated client records. The server responds with the new record data. The client uses this response data to update the local cache with the new version of the records, then re-renders the UI to display the latest block data.
Reading blocks
Your friend takes a nap, but you continue working on the to-do list. To let them know you’ve made some changes to the list, you send them a link to the Notion page you’ve both been working in.
In the first few milliseconds after your friend wakes up and clicks the link, we first try to load that page using only local data. On web, this means block data that’s in-memory. On our native apps, we try loading blocks that aren’t in memory from the RecordCache persisted storage. But if we need block data that’s missing, we stop and request the page data from the API instead.
The API method for loading the data for a page is called loadPageChunk — it descends from a starting point (likely the block ID of a page block) down the content tree, and returns the blocks in the content tree plus any dependent records needed to properly render those blocks. We use several layers of caching for loadPageChunk, but in the worst case, this API might need many trips to the database as it recursively crawls down the tree to chase down blocks and their record dependencies.
All data loaded by loadPageChunk is put into memory (and saved in the RecordCache if you’re using the app). Once the data is in memory, we lay out the page and render it using React.
Building blocks for what’s next
Blocks are the most foundational component of Notion’s mission to empower any person or business to tailor software to their problems. This architecture sets a path for Notion’s future — new block types, automations (like the API), workflows, and functionality that enables you to create even more powerful tools.
Still, we know there’s a lot of room to grow Notion the product, improving things like efficiency, performance, offline, and block-specific quirks in the editor. What you see when you’re using Notion is only the part of the iceberg that’s above the surface. After reading this, we hope you understand a bit of what’s underneath.
We’re looking for help to build the future of Notion. Is that you?
