
In the previous lesson, we explored phishing emails, email headers, and their functions. Now we'll learn how to analyze suspicious emails when we suspect phishing.
Here are the key questions to answer when examining headers during a phishing analysis:
The email we'll examine in this article:
Was the email sent from the correct SMTP server?
We can check the "Received" field to trace the email's path. As shown in the image below, the email originated from the server with IP address "101[.]99.94.116".
Looking at the sender, we can see the email comes from the domain "letsdefend.io".

Normally, "letsdefend.io" should use "101[.]99.94.116" to send mail. To verify this, we can check which MX servers "letsdefend.io" actually uses.
"mxtoolbox.com" helps by displaying the MX servers used by any domain.
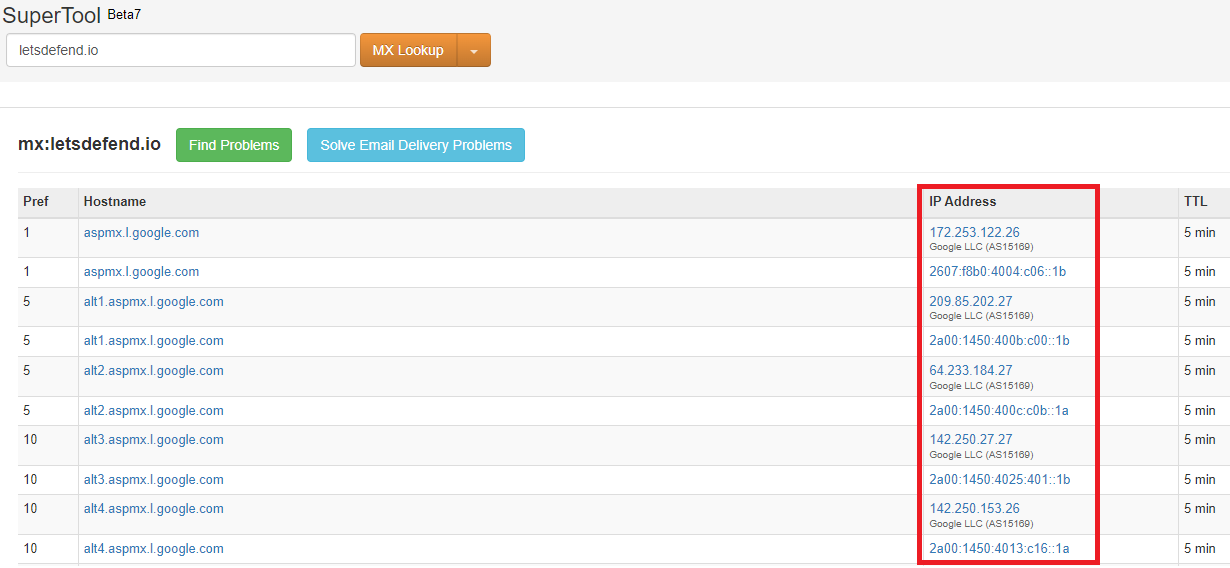
The image shows that "letsdefend.io" uses Google addresses for its email server. This means there's no connection to emkei[.]cz or "101[.]99.94.116".
This analysis reveals that the email was spoofed rather than sent from the real address.
Are the 'From' and 'Return-Path/Reply-To' details the same?
Generally, the sender's address and reply-to address should match. Here's how attackers exploit these fields in phishing attacks:
For example, an attacker might email LetsDefend using a name similar to a Google employee's, claiming they've issued an invoice requiring payment to a specific account. They'll set the "Reply-To" field to the real Google employee's email address to make the fraudulent email appear legitimate when replied to.
Returning to our downloaded email, let's compare the 'From' and 'Reply-to' addresses.